ID Card Generator Guide
Project Pages
Use these pages to move through the full ID Card Pro workflow:
Home
Start from the landing page and navigate to pricing, help, login, or the generator.
Pricing & Payment
Choose a plan, submit payment details, and wait for account access or generation limits to be updated.
Signup, Login & Email Verification
Create an account, verify your email, then log in before opening the generator.
Dashboard
Review your account status, subscription validity, remaining generations, and payment history.
Generator
Upload templates and data, design front and back layouts, preview cards, and export files.
FAQ & How to Use
Use the FAQ for common issues and this guide for the current end-to-end workflow.
Step 1: Upload Files
Open the Generator page after logging in. Start with either the Upload Files tab or the Google Sheets tab.
Card Templates
Upload separate front and back template images. PNG is recommended for best quality and transparency support. Click to view examples:
Data Source
Upload an .xlsx, .xls, or .ods spreadsheet, or load data from Google Sheets. ODS is recommended when your spreadsheet includes embedded images.
Image columns
Columns named with words like photo, image, or picture are treated as image fields. Use base64 image data for spreadsheet uploads, or publicly accessible image URLs for Google Sheets.
Step 2: Preview Data
After processing your files, review the Employee Data Overview before designing. This screen shows total records, detected data fields, filtered results, and data completeness.
- Search across all fields or filter by a specific column.
- Check the fill rate for each column in Data Field Analysis.
- Review the data table and export filtered data if needed.
- Use the Sample Employee Preview to confirm text and image fields are loading correctly.
Step 3: Design Cards
This is the main layout phase. Design the front and back sides separately, then drag fields from Available Fields onto the card template. For a visual guide, see the field alignment example.
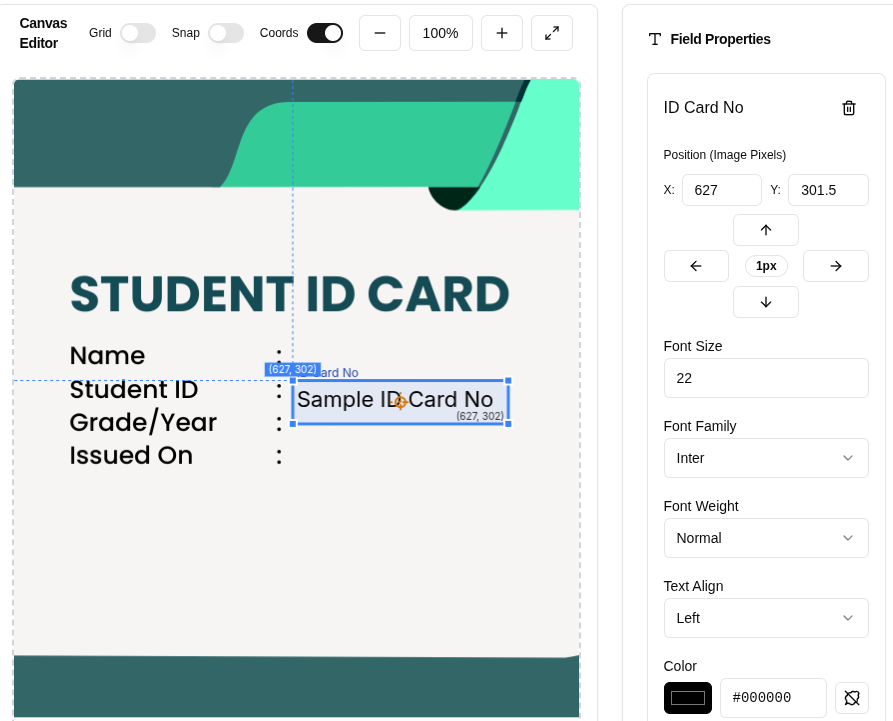
Design tools
- Switch between Front Side and Back Side tabs.
- Use Grid, Snap, Coords, zoom, and fit-to-view controls for accurate placement.
- Select a field to edit position, size, font, color, alignment, and image shape.
- For circular or square photos, keep width and height identical. The editor keeps circle and square image fields proportional.
Step 4: Preview Cards
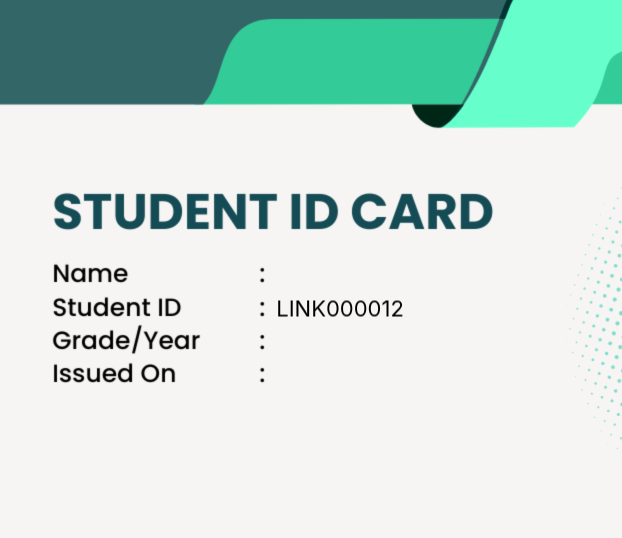
Once fields are positioned, preview the generated card layout with real employee data. Check both front and back sides, confirm photos and Bangla text render correctly, then continue to Generate Cards.
Example Output:
Step 5: Generate & Download
The Generate page renders high-quality cards with Fabric.js, shows progress, and prepares download packages.
- Bangla font selection: If Bangla text is detected, choose the font for each Bangla field before generating.
- Generated preview: Review the first rendered PNG cards directly on the page.
- Download Front Only: Download a ZIP containing front-side PNGs and a front-side PDF.
- Download Back Only: Download a ZIP containing back-side PNGs and a back-side PDF.
- Download Both Sides: Download one ZIP containing front and back PNGs, per-employee PDFs, separated front/back PDFs, and an all-cards combined PDF.
Optional: Plate Generation
After cards are generated, create a print plate PDF by entering plate width, height, cut gap, unit, and plate type. The plate PDF keeps each uploaded card's pixel dimensions and DPI.
Bangla text tip
Use the preview and font selector to confirm Bangla text shape and spacing before downloading final files.